Monday, July 23, 2012

Kitchen War... In a pickle

Wow, it's hard to believe it's been nearly a month since I posted an update about what has been going on around the house.  Robyn and I have been really busy... vacation, garden, volunteering, Twins game, and working around the house.

Towards the end of June, the greens in the garden started tapering off.  I did get one last big mess of turnip greens:


Which I blanched and then froze for a later time. 

In Minnesota, and the Twin Cities in particular, there is so much to do in the summer.  You just have to take advantage of it while the weather is nice.  We kicked off our vacation week on the Saturday before the 4th of July with a Twins game.


Robyn had to work the Monday and Tuesday before the 4th but I took those couple of days to get some stuff done around the house.  Unfortunately, it was so dang hot it was difficult to get much done.  I did finish up painting the upstairs back room where I've set up my office and finally got a motion activated light up on the garage to shine on our driveway.

Wednesday, July 4, we headed up to visit our friends, Pat and Bruce, who have a place up on Lake Superior in Cornucopia, Wisconsin.  A Unique small town just a short drive from the Apostle Islands.


Spent a lot of time relaxing and Robyn gave kayaking a try.  Here are our friends Pat and Bruce paddling across Siskiwit Bay.


The scenery was amazing.  From the Russion Orthodox church in Cornucopia...


To the falls of the Siskiwit River...


The view across Siskiwit Bay from the Siskiwit Lodge...


The panoromic view from Hauser's Superior View farms towards the Apostle Islands...


With their "kicking machine"...


Bayfield, Wisconsin is another picturesque town on Lake Superior with a ferry to Madelin Island and a large inventory of Victorian-era homes, including this one, Rittenhouse Inn, converted to a bed and breakfast.


I was wondering if this might be part of the same Rittenhouse family that is in Virginia.  I'm related to some of the Rittenhouse descendants.

Heading back to St. Paul, we stopped at a small community flea market alongside Highway 13 in Port Wing, WI.  Robyn fell in love with a late 19th century camel-back immigrants chest.  $25 later we were squeezing it into the back of her Sportage.


Even though it was missing the top shelf, it still had the original paper liner.


Back home, the cucumbers, yellow squash and zucchini was starting to come in:


And the squirrels found the sweet corn.


The week after the 4th of July, we started back on the house.  I cut a hole in the door to the basement for a pet door so the cats could get downstairs to the litter box:


Lucy and Angel aren't too terribly happy about it but we don't have to leave the door cracked anymore.  We're letting them get used to going through the hole before we put the actual pet door up.

In the kitchen, it was time to rebuild the cabinet under the sink.  When the ductwork was put in, the bottom shelf and ledge were cut out plus it had to be extended to accomodate the larger sink.  First down was the supports for the new shelf.


Then a piece of 3/4 inch plyboard was cut to fit to hole from the remnants of the plyboard we used for the suspended shelfs on the other side of the kitchen.


Screw holes and gaps were filled in with some wood putty.


Since I have a tendency to be a bit "generous" with paint, I decided to try Frog Tape when I taped off the re-built cabinet.


While I was doing this, Robyn was painting the remainder of the walls in the kitchen.


She used the Frog Tape as well and absolutely no paint bled through to the new countertop.  I, on the other hand, was not quite so lucky.


We finished off the sink cabinet with a skirt that Robyn made from some damask material she picked up at a thrift store.


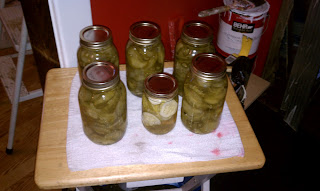
This past weekend, after some volunteer work on Saturday, we started on the next phase of the kitchen, the backsplash.  But first, we had to get our homegrown cucumbers soaking in Mrs. Wage Pickling Lime.


We're making sweet hot pickles with the hot peppers which are from our garden as well.


In between the steps of soaking, making syrup, soaking and canning, we started on the backsplash.  We'd debated about different materials, black granite floor tile, black ceramic tile, pressed tin, etc., but finally decided to use a leftover sheet of beaded board paneling; an idea Robyn found online.  She'd painted the whole 4x8 sheet the week before while I was working on the sink cabinet so all we had to do was cut and fit.

As with everything in this house, nothing is square and the distance between the countertop and the bottom of the cabinets ranged anywhere from 14 to 14 1/2 inches.  How did I find this out?  When the first piece I cut was 1/2 inch off.


Other than that, the biggest challenge I had was fitting a piece over the faucet and under the cabinet supports and not smear the Loctite adhesive everywhere.  I'd hoped to use a single piece of board centered over the sink.


But there just wasn't enough clearance.

The other pieces of paneling were a bit easier to do even though there were some involved cuts for the piece over the right side of the sink.


After some black caulk around the exposed edges, the backsplash was complete.


Just in time to finish up our sweet hot lime pickles.


Monday, June 25, 2012

Kitchen War... Hanging Around

It's been a busy couple of weekends on Pacific St.  Between graduation parties, volunteering at events and a little bit of gardening, not a whole lot has gotten done, including doing an update.

Weekend before last, after the Mason Jar light was hung up, I also got around to hanging up a couple of other things that'd been hidden away in various corners of the house.

First up, was a whimsical hanging light from Ikea which Robyn picked up last year.  Originally intended for a kid's bedroom, we just liked the feel it brought to the kitchen.


It doesn't put out a lot of light but with the other 2 lights in the kitchen we have plenty.

All of our cooking pots and pans were either hanging on nails in the basement stairwell or buried in the back of a bottom cabinet.  With the countertop in place, and before we put wallpaper up, I hung up our new pot rack.


Unfortunately, once we put the pots on it, we found out that they hang in our way when we work on the countertop.


It will get moved a bit back closer to the wall.  We also started painting the pine wood on the walls.  It just did not clean up well.  You can see the first part in the background of the picture.  We also started painting the plyboard on the back part of the counter extension.


We also pulled the doors off the new cabinets.  While Robyn was painting those outside, I installed our new tray / lid sliding rack in the cabinet between the stove and refrigerator.


... and painted the edge of the cabinets.


Later in the week, I was finally able to finish up the last little bit of countertop tile.


Now we need another trip to Ikea to pick up the rest of the knobs for the new pantry and cabinets.  This pretty much finishes up the kitchen except for under the sink, a little bit of painting and some wall paper on the ceiling.  I'll be starting on the new breakfast nook shortly.

Out in the garden, we harvested some bok choy


...and some turnip greens.


And had grilled pork chops with curried mustard greens with kidney beans.


We have a good mess of collard greens that need to be picked very soon and we're exploring some creative recipes for them as well.

Sunday afternoon, we cut grass and I finally got tired of ducking tree limbs.  I started off pruning a few hanging limbs but soon broke out the saw and ended up with a truckload to haul to the compost site down the road a bit.


Robyn says that now that people can see the front of the house...


I'm gonna have to clean the construction materials and debris off the front porch.

Tuesday, June 12, 2012

Kitchen War... White Lightning in a Mason Jar

For the past 15 months, I've been staring at this outlet box cover next to the cabinets...


...and this covered over light fixture over the sink.


 Wondering if at one time there was a light switch controlling a light over the sink.  I figured it was time to check.  First thing was to check to see if the wire behind the covers were live.


The red light means the wire is live. 

I wired up a new light switch and then checked the light fixture and found that when the light switch was on, the wire was live and when the switch was off, the wire was dead.  I had a place for another light in the kitchen.

While the power was off, I also replaced the other fixture. 


(I got a fixture with an outlet, Ken Watts, so we could have another one and get rid of the "octopus.")

I connected a simple pendant light that I had picked up from Home Depot a few days earlier.


I had originally picked this up with the intent of letting Robyn pick out the globe she wanted at a later date.  I wanted the fixture on hand for when I had time to fool with this outlet to see if I could get it to work.

But over the last few months, we'd seen a lot of "Mason Jar" chandeliers.  This things were ranging anywhere from $50 to $300 online which I thought was a bit pricey for something someone just through together without any real knowledge of electricity.  Yesterday, I saw one on Instructables where people commenting on it had some real concerns about the safety of the wiring.

However, the instructable did give me an idea.  Why couldn't I make a "Mason Jar" pendant light?  I had a UL listed light fixture, a Mason Jar, ring and lid.

First thing I did was trace the light socket on the lid.


I drilled four hole around the out edge and one in the center so I had a place to start with my tin snips.  (The lid is from some Mississippi sweet lime pickles with hot peppers that my sister Tammy made me.)


And of course, I couldn't find my tin snips and I ended up using my wire cutters to cut out the center of the lid.


It looks a little rough but I smoothed down the edges by squeezing the burrs with a pair of pliers to press them flat. 

Next, I took the ring and the lid and attached them to the pendant using the ring that came with the pendant.


Screwed in a bulb and then the jar onto the lid...


Over to the light switch to flip it on...


...and for the price of a $15 pendant light, an old jar, and a used ring and lid, we had "white lightning" in a mason jar. 

Later, I'll replace the CFL bulb with a cooler (temperature-wise) LED bulb.  They were all too expensive at Target when we ran in there to pick up some other items.