For example, the mud on the walls has to dry 24 hours between applications and we couldn't work on the floor while that was drying. Floors couldn't be sanded while paint was drying on the walls. The floor paint had to dry 4 hours between each of three coats, cure for 24 hours before applying the water based polyurethane which had to dry 2 hours between 2 coats, cure for 24 hours before applying 2 more coats and then cure for a week before anything could be moved on top.
But this weekend, we made tremendous progress.

The remaining area of the floor was stripped down. (This is a "before" picture; forgot to take the "after" picture.)

Once the dust settled from the floor, the final coats of red paint were applied to the last section of the wall. Then the fun really started...
While a coat of paint was drying on the suspended shelves, the cleats which are supporting the rear of the shelves went up.

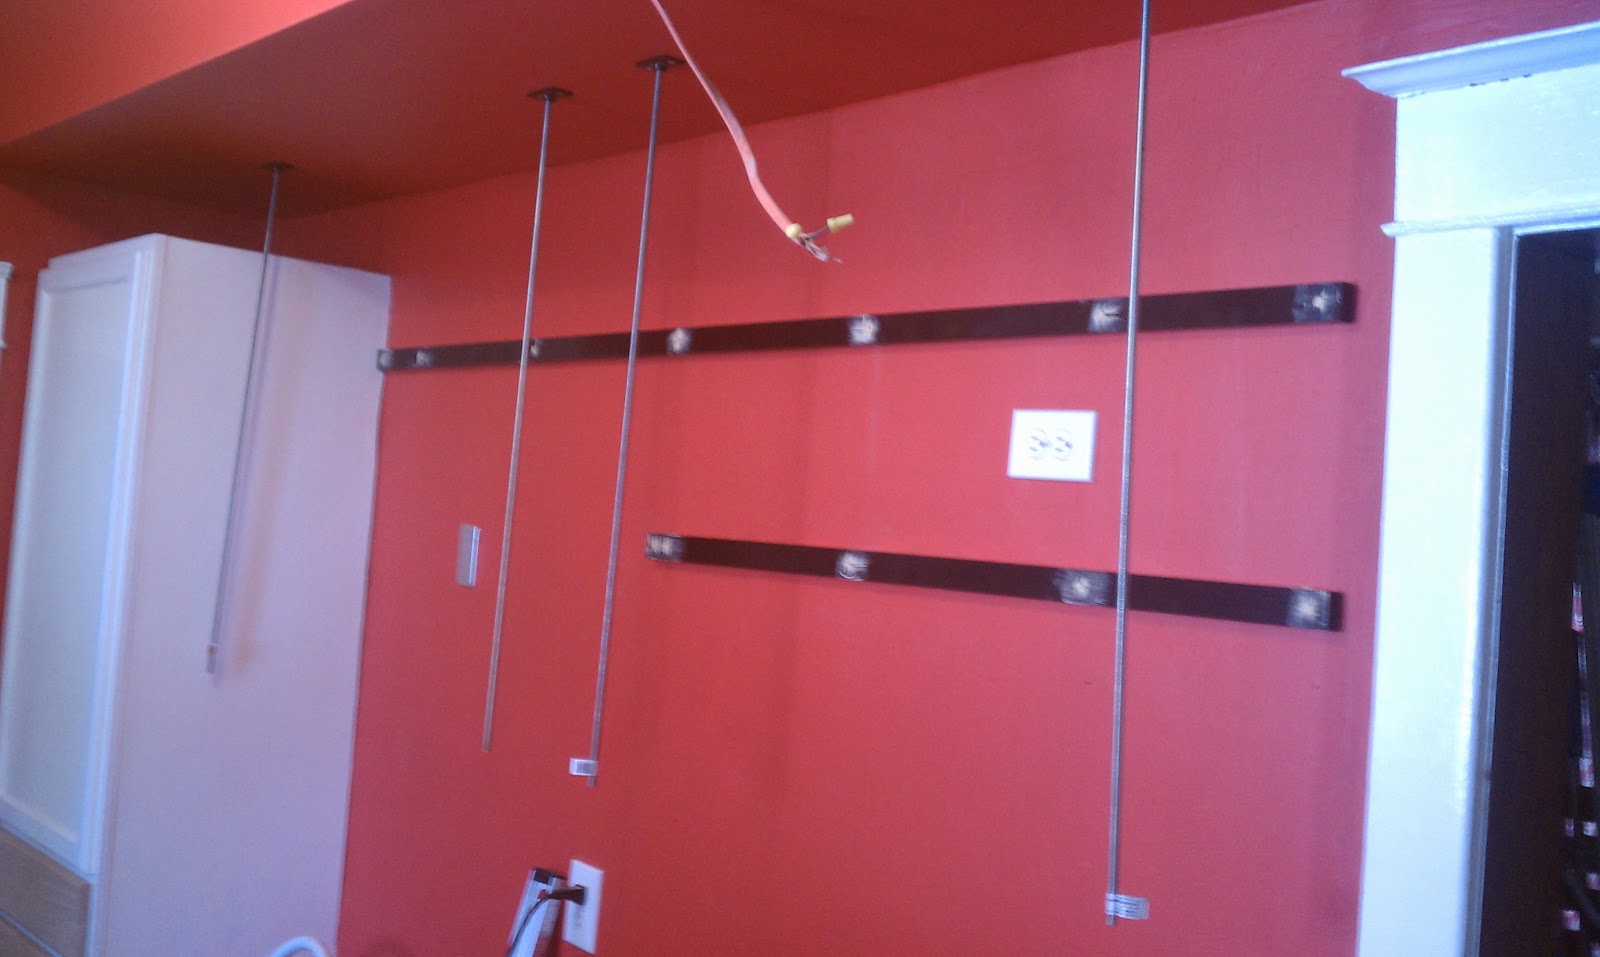
Holes were countersunk for the wood screws which attaches the cleats to the wall studs.

And then patched. (And one day in the not too distant future, that light will be attached too.)
The threaded rod hangers were attached to the stringer I had built in the soffit box for the ductwork.

And then I made sure that the theaded rod would actually thread into each hanger.
As I waited for the final coat of paint to dry on the shelves, I finished plumbing the ice maker water line.

Later, I found out that the fitting was the wrong size for the ice maker tubing so it will have to be replaced but at least all of the soldering is complete.
Robyn held the shelf boards up on the cleats while I used a plumb bob to mark the locations that the theaded rod would pass through.

Screwholes for the wood screws that attach the back of the shelves to the cleats were drilled and counter sunk.
The shelves were attached to the cleats with just a couple of screws at first and then the thread rod passed up through the holes in the front of the shelves.

Using the nuts with the washers, I was able to do fine adjustments to level the shelves. Here are the shelves attached to the wall before the back is completely secured to the cleats.

Although I used 3/8" inch rods, they provided enough flexibilty to allow for my impatience waiting for the plumb bob to stop swinging.
Once the shelves were permanently attached, trim molding was attached to the edges of the plyboard and the excess threaded rod on either end was removed by a bolt cutter.

The two rods in the center were reserved for an additional small shelf.
Then it was time to hang the convention microwave oven. The oven weighs approximately 75 pounds which accounts for the robustness of the suspended shelf design.

Using the back plate as a template, holes were drilled for the toggle bolts which would attach the back plate to the wall.

I discovered too late that the template had slipped down some when I was marking the hole location. Not a major concern since I was having to attach a spacer block to account for the cleat along the back wall.

Voila!!! Microwave installed. I'll put a skirt up later to conceal the spacer block. The excess on the middle two threaded rods was cut off as well since there wasn't enough room for another shelf after the microwave went up.
Just a few more minutes and the appliances and new cabinet (still to be painted and attached to the wall) were in place

Robyn even was able to get some time to plant some periennal geraniums that our neighbor Kim gave to us.

No comments:
Post a Comment